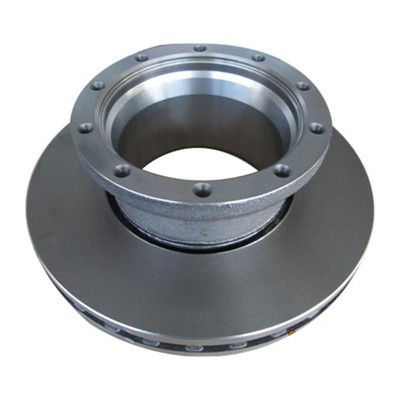
Cleaning LADA brake pads is an essential maintenance task that can significantly enhance their performance and longevity. As a dedicated LADA Brake Pads supplier, I understand the importance of proper brake pad care. In this blog, I'll share detailed steps on how to clean LADA brake pads effectively, along with some valuable insights into brake pad maintenance.


Why Clean LADA Brake Pads?
Before delving into the cleaning process, it's crucial to understand why cleaning your LADA brake pads is necessary. Over time, brake pads accumulate dirt, dust, brake dust, and other contaminants. These particles can cause uneven wear, reduce braking efficiency, and even lead to squeaking or grinding noises. By regularly cleaning your brake pads, you can:
- Improve Braking Performance: Removing contaminants ensures that the brake pads make proper contact with the brake rotors, resulting in better stopping power.
- Extend Brake Pad Lifespan: Reducing the build - up of debris helps prevent premature wear, saving you money on frequent replacements.
- Enhance Safety: Well - maintained brake pads are essential for safe driving, especially in emergency situations.
Tools and Materials Needed
To clean your LADA brake pads, you'll need the following tools and materials:
- Safety Equipment: Safety glasses and gloves to protect your eyes and hands from brake dust, which can be harmful if inhaled or comes into contact with your skin.
- Brake Cleaner: A high - quality brake cleaner is specifically designed to dissolve brake dust and other contaminants.
- Wire Brush: A small wire brush can be used to gently scrub the brake pads and remove stubborn dirt.
- Compressed Air: An air compressor or a can of compressed air can help blow away loose debris.
- Rags or Paper Towels: For wiping down the brake pads and other components.
Step - by - Step Cleaning Process
Step 1: Prepare Your Vehicle
- Park your LADA on a flat, stable surface and engage the parking brake.
- Loosen the lug nuts on the wheels where you'll be cleaning the brake pads, but don't remove them yet.
- Jack up the vehicle and support it securely on jack stands. Make sure the vehicle is stable before proceeding.
- Remove the wheels to access the brake pads and rotors.
Step 2: Inspect the Brake Pads
- Take a close look at the brake pads for signs of excessive wear, damage, or unevenness. If the brake pads are worn beyond the recommended thickness, they should be replaced rather than cleaned.
- Check the brake rotors for any signs of scoring, warping, or excessive wear. If the rotors are damaged, they may need to be resurfaced or replaced.
Step 3: Remove Loose Debris
- Use compressed air to blow away any loose dirt, dust, and debris from the brake pads, calipers, and rotors. Hold the air nozzle a few inches away from the components and move it around to ensure thorough cleaning.
- Pay special attention to the areas between the brake pads and the calipers, as this is where a lot of debris can accumulate.
Step 4: Apply Brake Cleaner
- Put on your safety glasses and gloves.
- Spray the brake cleaner generously onto the brake pads, making sure to cover all surfaces. The brake cleaner will dissolve the brake dust and other contaminants.
- Let the brake cleaner sit on the brake pads for a few minutes to allow it to work its magic.
Step 5: Scrub the Brake Pads
- Use a small wire brush to gently scrub the brake pads. Be careful not to apply too much pressure, as this could damage the brake pads.
- Focus on removing any stubborn dirt or debris that the brake cleaner may not have dissolved. Scrub the edges and the friction surface of the brake pads thoroughly.
Step 6: Rinse and Dry
- After scrubbing, use compressed air again to blow away the dissolved contaminants and any remaining debris.
- Wipe down the brake pads with a clean rag or paper towel to remove any residual brake cleaner and dirt.
- Repeat the process on the other side of the brake pads if necessary.
Step 7: Reassemble the Components
- Once the brake pads are clean and dry, carefully reinstall the wheels.
- Tighten the lug nuts in a star pattern to ensure even tightening.
- Lower the vehicle off the jack stands and check the tightness of the lug nuts again.
Additional Tips for Brake Pad Maintenance
- Regular Inspections: Make it a habit to inspect your LADA brake pads regularly. Look for signs of wear, damage, or abnormal noise.
- Avoid Harsh Driving: Aggressive driving, such as hard braking and rapid acceleration, can cause excessive wear on the brake pads.
- Keep the Brakes Clean: In addition to periodic cleaning, try to keep your brakes clean by avoiding driving through deep puddles or mud.
Related Brake Pads
If you're also interested in brake pads for other car models, we offer a wide range of options. Check out our BUICK Brake Pads, ALFA ROMEO Brake Pads, and CITROEN Brake Pads.
Contact for Purchase and Consultation
As a reliable LADA Brake Pads supplier, we are committed to providing high - quality products and excellent customer service. If you have any questions about our LADA brake pads or need further information on brake pad maintenance, feel free to contact us. We are more than happy to assist you with your purchasing needs and provide professional advice.
References
- "Automotive Brake Systems" - A comprehensive guide on brake system components and maintenance.
- Manufacturer's manual for LADA vehicles, which provides specific information on brake pad care and replacement.